Thursday, December 18, 2014

Saturday, September 20, 2014
Star Trailing
So I finally got a chance to do some Star trails last evening out in the Kuwait desert, thanks to Q8 Expats Photography Club - Q8EPC that organised the event.
The specifics on how to go about doing it are all mentioned below. I made sure I tried to cover everything in this article but in case you have a question do leave a message and I will reply back.
Pick a night with no moon or at least one when the moon won't appear until you are done with your shooting. Note, you will need a good 2 to 3 hrs approx. to shoot the star trails.
Equipment required.
1. DSLR camera or a any camera which you can adjust the settings Manually.
2. Extra Battery (you will be clicking around 250 - 300 shots on long shutter so definitely need an extra battery)
3. A sturdy Tripod stand.
4. Shutter release cable
5. Minimum 8 GB memory card if you are shooting in RAW format, 4 GB card is enough if shooting in jpeg.
6. Preferable lens to be used is Wide angles / ultra wide angles / Fisheye. (You will want as much as sky in your frame so the wider the better) I shot mine with the Sigma 10mm 2.8F Fisheye.
Pick up spot with a good foreground (Building / Tree / Boulder etc)
Set up tripod with your camera facing the North Star (use Google sky map App or any other app to locate the North Star)
Make sure the tripod is in a spot that will not move or shake for the next 2 - 3 hours.
Camera Settings:
1. Click in Manual Mode setting
2. Change Focus to Manual on your lens.
3. Adjust focus Manually to Infinity, its the sleeping 8 sign on most lenses. if you don't have it, look through the view finder and adjust the focus until the stars in the sky appears sharp.
4. Shutter Speed - Keep at 30 seconds or lower. More than then that, stars won't be sharp in the pics due to the earth continuous rotations.
5. Aperture - Keep at lowest aperture your lens will allow so as to allow as much light into the sensor as possible.
6. ISO - Once Shutter and Aperture is set, tweek you ISO setting to what you feel gives you the best image. Keep it lower to avoid grains in the image ISO400 or lower will do, take test shots at various ISO levels between ISO100 - 400 (unless your camera can go lower than 100) and adjust accordingly.
7. White Balance - Set White balance to your choice - I set mine at Tungsten if you are clicking in RAW -WB is not an issue as you can easily adjust it in Photoshop or other software
8. No need to change any other setting on the camera.
Connect your shutter release cable to the camera.
2 main reason on using the shutter release cable is to avoid touching the camera and chances of shifting the camera / tripod is low &
If you lock the shuter release button it will take the pics for you after every 30 secs on it's own, so you can leave it and do what ever you want in the meantime and come back 2-3 hrs later.
However to do this u need to adjust a setting in your camera in the shutter release options.
Press & lock the shutter release button and let the camera do its job. The camera should keep taking the images automatically every 30 secs, if it does not adjust the settings on your camera or you will need to press the shutter button on the shutter release every 30 seconds. (which is what i ended up doing as I didn't find the option on my camera).
There are even apps available that can do this, connect your phone / Tab / iPad / laptop to the camera and use the app or any software to trigger the release automatically after you set the timings.
Don't forget to take some munchies / water etc's as you will be out for a long time.

Note if your shutter speed is at 30 secs, then your camera is taking 2 images approx a minute. i.e is 120 images an hour or 240 after 2 hours and 360 after 3 hours. The more snaps you click the longer the star trails will appear. I used about 160 images only to make my star trails as we were running out of time and needed to leave soon.
Once you are done the next job starts on your PC / Laptop. You will require a software that will get allow you to stack the images together, I used Photoshop to do mine. A lot of free to use software's are available online to choose from like - StarStax Free Download
There are also plenty of videos online on youtube that will show you how to use software's like Photoshop or Starstax to get the effects. Here are a couple of video links if you are using Photoshop or StarStax
1. How to Make a Star Trails Photoshop using stacked images. - Photoshop
2. Star trails Demo - StarStax

You can further crop / tweek the color balance if you like, that's up to you. I was satisfied with this once.
So here you go, get out there and get some pics taken and do your star trails, upload the pics and tag us #SnapThat on Facebook or Instagram.
See you guys soon
SnapThat - Facebook
The Idea behind getting Star trails is pretty simple. Take multiple shots of a stary night sky with the Pole star in your frame, stack them all together in a software system and Voila! you are done. simple eh!
Why Pole Star you ask? Coz it is approximately aligned with
the Earth's axis of rotation.
While other stars' apparent positions in the sky
change throughout the night, as they appear to rotate around the celestial
poles, pole stars' apparent positions remain virtually fixed. (Read on
Pole_star for more info)The specifics on how to go about doing it are all mentioned below. I made sure I tried to cover everything in this article but in case you have a question do leave a message and I will reply back.
Pick a night with no moon or at least one when the moon won't appear until you are done with your shooting. Note, you will need a good 2 to 3 hrs approx. to shoot the star trails.
Equipment required.
1. DSLR camera or a any camera which you can adjust the settings Manually.
2. Extra Battery (you will be clicking around 250 - 300 shots on long shutter so definitely need an extra battery)
3. A sturdy Tripod stand.
4. Shutter release cable
5. Minimum 8 GB memory card if you are shooting in RAW format, 4 GB card is enough if shooting in jpeg.
6. Preferable lens to be used is Wide angles / ultra wide angles / Fisheye. (You will want as much as sky in your frame so the wider the better) I shot mine with the Sigma 10mm 2.8F Fisheye.
Pick up spot with a good foreground (Building / Tree / Boulder etc)
Set up tripod with your camera facing the North Star (use Google sky map App or any other app to locate the North Star)
Make sure the tripod is in a spot that will not move or shake for the next 2 - 3 hours.
Camera Settings:
1. Click in Manual Mode setting
2. Change Focus to Manual on your lens.
3. Adjust focus Manually to Infinity, its the sleeping 8 sign on most lenses. if you don't have it, look through the view finder and adjust the focus until the stars in the sky appears sharp.
4. Shutter Speed - Keep at 30 seconds or lower. More than then that, stars won't be sharp in the pics due to the earth continuous rotations.
5. Aperture - Keep at lowest aperture your lens will allow so as to allow as much light into the sensor as possible.
6. ISO - Once Shutter and Aperture is set, tweek you ISO setting to what you feel gives you the best image. Keep it lower to avoid grains in the image ISO400 or lower will do, take test shots at various ISO levels between ISO100 - 400 (unless your camera can go lower than 100) and adjust accordingly.
7. White Balance - Set White balance to your choice - I set mine at Tungsten if you are clicking in RAW -WB is not an issue as you can easily adjust it in Photoshop or other software
8. No need to change any other setting on the camera.
Connect your shutter release cable to the camera.
2 main reason on using the shutter release cable is to avoid touching the camera and chances of shifting the camera / tripod is low &
If you lock the shuter release button it will take the pics for you after every 30 secs on it's own, so you can leave it and do what ever you want in the meantime and come back 2-3 hrs later.
However to do this u need to adjust a setting in your camera in the shutter release options.
Press & lock the shutter release button and let the camera do its job. The camera should keep taking the images automatically every 30 secs, if it does not adjust the settings on your camera or you will need to press the shutter button on the shutter release every 30 seconds. (which is what i ended up doing as I didn't find the option on my camera).
There are even apps available that can do this, connect your phone / Tab / iPad / laptop to the camera and use the app or any software to trigger the release automatically after you set the timings.
Don't forget to take some munchies / water etc's as you will be out for a long time.
Below is a example of one of images
Note if your shutter speed is at 30 secs, then your camera is taking 2 images approx a minute. i.e is 120 images an hour or 240 after 2 hours and 360 after 3 hours. The more snaps you click the longer the star trails will appear. I used about 160 images only to make my star trails as we were running out of time and needed to leave soon.
Once you are done the next job starts on your PC / Laptop. You will require a software that will get allow you to stack the images together, I used Photoshop to do mine. A lot of free to use software's are available online to choose from like - StarStax Free Download
There are also plenty of videos online on youtube that will show you how to use software's like Photoshop or Starstax to get the effects. Here are a couple of video links if you are using Photoshop or StarStax
1. How to Make a Star Trails Photoshop using stacked images. - Photoshop
2. Star trails Demo - StarStax
Below is the end result.
You can further crop / tweek the color balance if you like, that's up to you. I was satisfied with this once.
So here you go, get out there and get some pics taken and do your star trails, upload the pics and tag us #SnapThat on Facebook or Instagram.
See you guys soon
SnapThat - Facebook
Friday, March 8, 2013
Tuesday, February 26, 2013
Bernardo Portfolio Pics
This shoot was done many many months ago just decided to put up a few of the pics now.

BERNARDO PIRES, a powerful, versatile and genuinely gifted midfielder is one of them. His ability to engineer defense splitting passes, terrorize goalkeepers with stinging shots on goals, control the flow of the game with his superb vision, and consistently give his 100% in the overall interest of his team, has made him one of the most respected midfielders to have graced the lawns of Indian football.

Sunday, August 12, 2012


Friday, August 10, 2012


Sunday, July 29, 2012
Orange Slices

Who the hell cuts & eats oranges like that!!
Unless it dishes out a good plate for photography :)
Friday, July 27, 2012
Xtreme Sport

Went to the XGames, Kuwait Style :P Naah.. It was just Xtreme sport organised a tournament for local stunt riders to show off their tricks, divided between groups of Amateurs & Pros. Most of the kids in the Amateur Category did really well but what was most surprising was that non of them had any safety gear on? C'mon you could seriously hurt your self out on those ramps.
The guy pictured above is Superman, atleast that's what his shirt said from the front and boy could he Fly!! Check some of the pics from the event below.


Saturday, July 21, 2012
Falling Down? or Rising Up?

Rising Or Falling?
Times flies so fast, again its been over a week since the last post.. although I did spend a lot of time with my camera and clicked hundreds of pics last week, I never really found enough time to update the Blog.. today however I decided to make sure I did so.
Using the flash gun I made captured this image of water bubbles in my fishy tank.. If you didn't already guess by now, the image is upside down. It gives it a different perspective and point of view of a simple everyday object. The below settings were used to make this image.
Camera: Canon EOS 500D
Lens: Canon
Focal Length: 50mm
Shutter Speed: 1/60
Aperture: f/4.0
ISO: 200
Flash Gun: Nissin Pro Di866 Mark II
Saturday, July 14, 2012
Day 15 with the 50mm

Spell Check Error
I'm not sure what the guy wanted to say here!
And if u wondering who is standing behind? It's none other that Kevin!!
:D
And if u wondering who is standing behind? It's none other that Kevin!!
:D
Friday, July 13, 2012
The Judge - Pontiac GTO

Aaaaaahhh!! its been a week since my last post coz unfortunately I haven't had the time to update the Blog. Mornings would be busy with work work work and then evenings would be really tiring. Did have fun last Saturday though clicking pics for the senior citizen program, held by the Youth of our Parish. I used the 50mm to click... Yup I don't know what i was thinking. :P but the pics did turn out pretty good.
Today after mass we stopped by the Local Supermarket and parked right outside one of the buildings close-by was this Pontiac GTO, I've seen it there for the last 5 - 6 yrs now and I've always wanted to click some pics of it. So today I Did, used the stock lens only on Av Mode @ f18 for this shot. It's a Dream car to own and I envy the guys how has the keys to this beast.
Friday, July 6, 2012
Day 7 with the 50mm

Phew! Had one of the most exhausting shopping experience today. 3 guys, 2 hrs, 1 bottle of water later we returned with 0
items, yep ZERO!!! It started out with a yummy Snack of Samosa Chaat @ Amman
rest in Salmiya with Kevin and then picked up Anselm or should I say he
picked us in his new loaned-out ride.
We had one goal in mind, get some Hawaiian themed outfits for the Senior Citizens program being held tomorrow. Unfortunately luck wasn't with us, as either the Beach pants were too short, too expensive, too plain or just unavailable. Even good t-shirts were not available in the 6 outlets that we went too. Finally we gave up and decided to pick thru our old stack of clothes. Too tired now to type any further..goodnight all.
We had one goal in mind, get some Hawaiian themed outfits for the Senior Citizens program being held tomorrow. Unfortunately luck wasn't with us, as either the Beach pants were too short, too expensive, too plain or just unavailable. Even good t-shirts were not available in the 6 outlets that we went too. Finally we gave up and decided to pick thru our old stack of clothes. Too tired now to type any further..goodnight all.
Wednesday, July 4, 2012
Day 6 with the 50mm
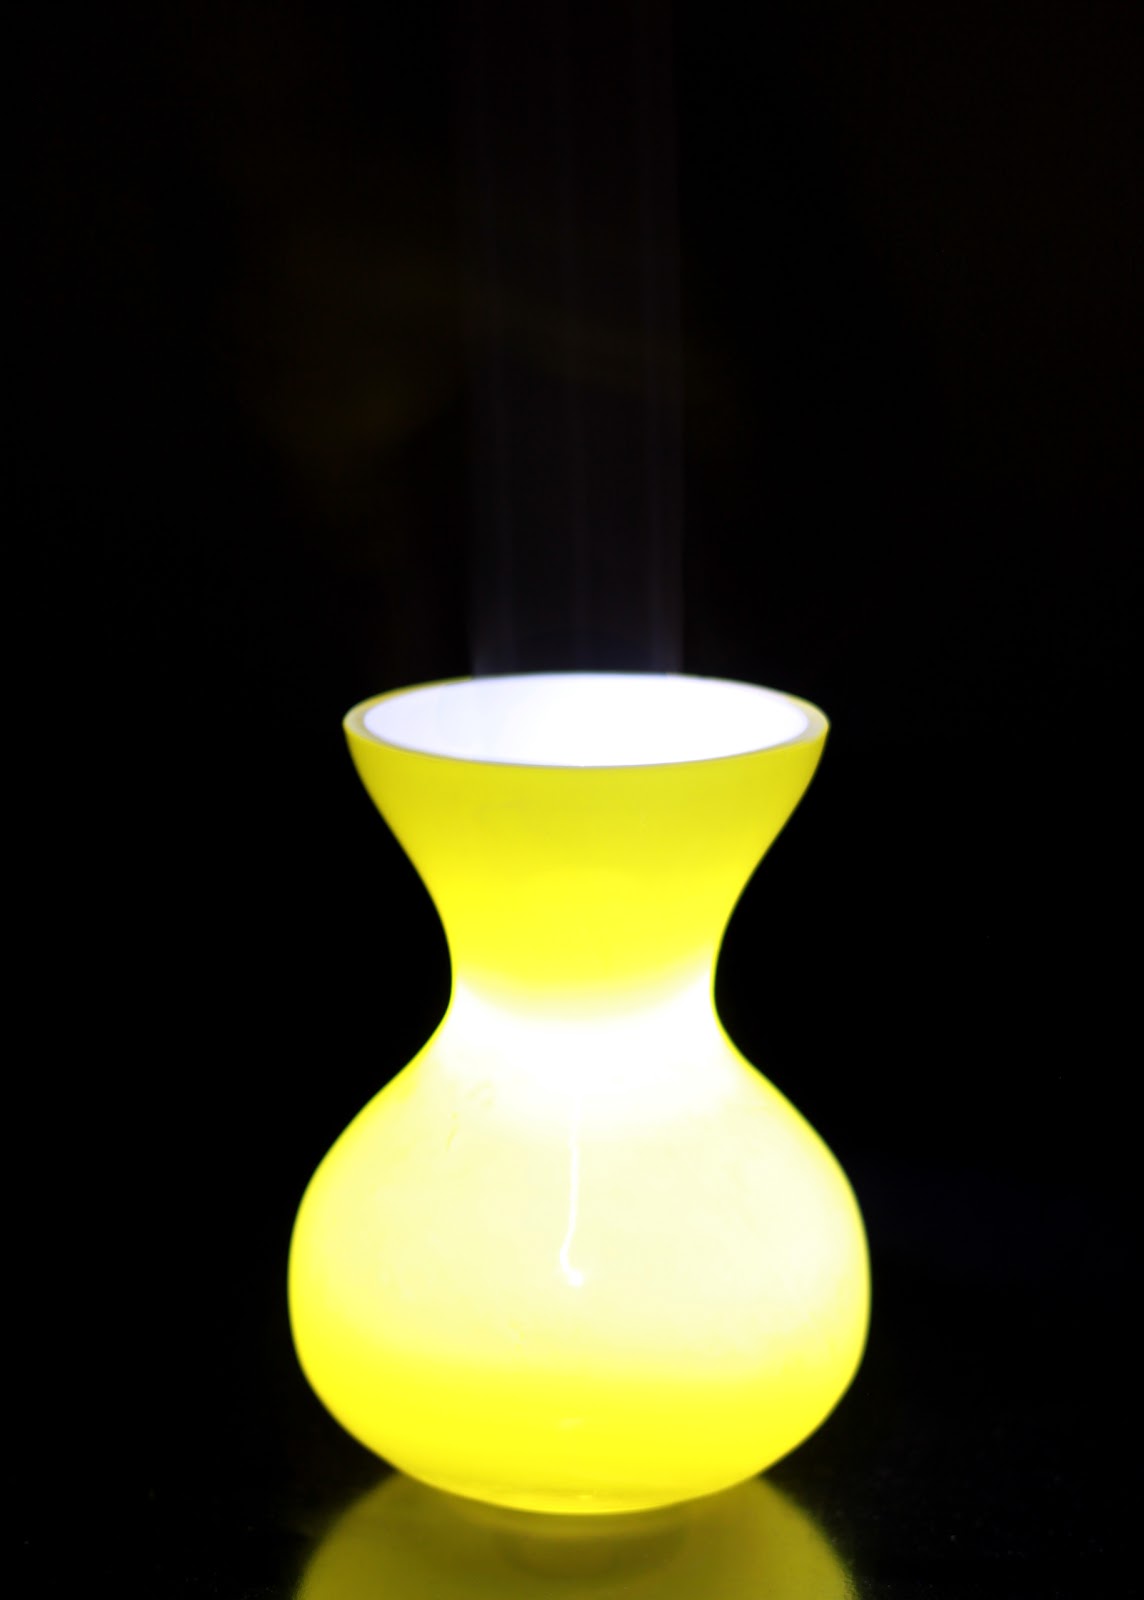
The Glowing Lamp
Ok, yea I know the Day 5 Post is missing, unfortunately I was out yesterday from morning 7am and got back home only at 10 pm last night so was too exhausted to do any photography and fell off right to sleep.
Above i used an Ordinary vase, put an LED light into it and clicked at a slow shutter, it gave this lovely glow to it and was surprised to catch the trails of light exiting out of the vase.
Monday, July 2, 2012
Day 4 with the 50mm

Just my Regular Cup of Bokeh!
Today I decided to try this Bokeh effect, have seen it done online a couple of times and wanted to do it better. It's been my mind last couple of days & although I wanted to actually make a tribute to Spain today for taking the Euro Cup, somehow my mind was on getting this image done.
Took me about 15 mins to set up the frame to shoot. Tried to use different objects too like a vase, glass bowl and kept adjusting the settings on the Cam till I got this image.
Its very simple technique to do and I enjoyed every bit of it. Dad joined in too and became the Light assistant while i was behind the lens :D Thanks Dad!!
Due to Public Request, I have updated this article to explain further on the Bokeh Effects
Bokeh comes from the Japanese word 'Boke', meaning Blur or Haze & is used to describe the 'Out of Focus' area in an Image i.e An image where you have a subject in Focus (Mug) and the background blurred out (lights) is called Bokeh effect. Here, the Blurred background is pleasing while not distracting from the actual Subject.
Imagine your eye is the lens of the Camera, if you keep the palm of your hand close to your face and focus on it, you will notice that while you are focused on your subejct (Palm) the background is blurred and the further you move your palm away from your Eye & closer to the background, the clearer it gets. So Bokeh effect is caused when the subject is close to the lens of the camera and further away from the Background causing the background to Blur up.
Hope this helps! :)
Took me about 15 mins to set up the frame to shoot. Tried to use different objects too like a vase, glass bowl and kept adjusting the settings on the Cam till I got this image.
Its very simple technique to do and I enjoyed every bit of it. Dad joined in too and became the Light assistant while i was behind the lens :D Thanks Dad!!
Due to Public Request, I have updated this article to explain further on the Bokeh Effects
Bokeh comes from the Japanese word 'Boke', meaning Blur or Haze & is used to describe the 'Out of Focus' area in an Image i.e An image where you have a subject in Focus (Mug) and the background blurred out (lights) is called Bokeh effect. Here, the Blurred background is pleasing while not distracting from the actual Subject.
Imagine your eye is the lens of the Camera, if you keep the palm of your hand close to your face and focus on it, you will notice that while you are focused on your subejct (Palm) the background is blurred and the further you move your palm away from your Eye & closer to the background, the clearer it gets. So Bokeh effect is caused when the subject is close to the lens of the camera and further away from the Background causing the background to Blur up.
Hope this helps! :)
Savio A D'souza
-SnapThat
Sunday, July 1, 2012
Day 3 with the 50mm

Bored in the Beamer!
Caught this fellow sitting bored at the petrol station waiting his turn to enter the car wash.
Was lucky to even click this pic, apparently there's a no snapping at petrol station rule here in Kuwait, we got told by the station attendant to turn off the cam. Did you know there was something like that? I mean come on!! Who makes these rules up? lol
The 50mm here really impressed me with the image sharpness and clarity and am glad was able to Snapthat ;)
Saturday, June 30, 2012
Day 2 with the 50mm

SelfShot
So I took the Cam to work today and started clicking at anything and everything I could find. Called Kevin up and one of the first things he asked me was.. 'Did you take the cam to work?', man i'm so predictable :P But only one guy knows me that well and it's Barco Man (Kevin). enjoyed the day with the 50mm, images seemed to be more clearer and crisp. The auto focus seems to be a lot faster as well. Can't wait to wake up tomorrow and start clicking again!
Friday, June 29, 2012
Day 1 with the 50mm

Hitting the Right Notes!
My poor bass guitar! I don't recall what my idea of purchasing this lovely instrument was in the first place. probably thought it would look cool :P . Been almost 3 years that I touched it and mom has been after me to get rid of it. But for some reason I was never really able to do that. Maybe someday in the future I might pick it up and start to learn again, until then it at least makes for a good subject to photograph!
50 Days- 50 Pics - 50mm
Yea to me! I purchased
the Canon EF 50mm F1.8 II Prime lens today! It's the cheapest but one of the
best lens of it's category. With an Aperture reaching as Large as F/1.8
clicking images in low light is not a problem anymore.
This little monster came
in a tiny little box but packs a big punch on street & portraits
photography. Already tested it, clicking a few shots and instantly noticed the
sharpness of the images. The super compact sized and light
weight lens really makes it easier on the wrist's as well.
I have decided to do a
project: 50 day- 50 pics with he new 50mm lets see how far I get with
this, so wish me Luck!

Morning out with Ian & Kevin!
Yawn!!! still exhausted from all the running jumping and monkeying around this morning. Woke up @ 5.30 am today as we were supposed to go to the beach to click some snaps. We had to still get the 2nd Image done for the 'Ernst & Young' Brand name competition and had been scratching our head for ideas. Sunrise was at 4.50 am and by the time we could all actually hit the road it was already 6.30am and bright
We decided to set up on the lawns out side Al Corniche Club on Gulf road and tried to get some flying images, motion Blur / Panning shots, just random stuff.

Kevin and Ian decided to go for a Run :P

Ian seemed to be in a surprisingly good mood to get some snaps pics done and was happy to be the model in most of the pics, he didn't even mind getting into the water fountain.:P

And then we started flying!!!

Just me :)


Show Off!!! hmph!
On the whole it was a fun day with 2 good friends, wish more could have joined this morning.
That's all for now, gonna go back to sleep.
Check some more crazy pics below

Kevin trying to be funny!


Trying to frighten his own reflection!

Enjoying life with every click! :)
We decided to set up on the lawns out side Al Corniche Club on Gulf road and tried to get some flying images, motion Blur / Panning shots, just random stuff.

Kevin and Ian decided to go for a Run :P

Ian seemed to be in a surprisingly good mood to get some snaps pics done and was happy to be the model in most of the pics, he didn't even mind getting into the water fountain.:P

And then we started flying!!!

Just me :)

My planet needs me!!

Show Off!!! hmph!
On the whole it was a fun day with 2 good friends, wish more could have joined this morning.
That's all for now, gonna go back to sleep.
Check some more crazy pics below

Kevin trying to be funny!

Leaning tower of Kuwait???

Trying to frighten his own reflection!

Enjoying life with every click! :)
Savio Dsouza
-SnapThat
Subscribe to:
Posts (Atom)